Setting a remote environment 
MLRun allows you to use your code on a local machine while running your functions on a remote cluster. This tutorial explains how you can set this up.
In this section
Prerequisites
Before you begin, ensure that the following prerequisites are met:
Install MLRun locally.
You need to install MLRun locally and make sure the that the MLRun version you install is the same as the MLRun service version. Install a specific version using the following command; replace the
<version>placeholder with the MLRun version number (e.g.,1.0.0):pip install mlrun==<version>
If you already installed a previous version of MLRun, you should first uninstall it by running:
pip uninstall -y mlrun
Ensure that you have remote access to your MLRun service (i.e., to the service URL on the remote Kubernetes cluster).
Configure remote environment
Set environment variables
Set environment variables to define your MLRun configuration. As a minimum requirement:
Set
MLRUN_DBPATHto the URL of the remote MLRun database/API service; replace the<...>placeholders to identify your remote target:MLRUN_DBPATH=<API endpoint of the MLRun APIs service endpoint; e.g., "https://mlrun-api.default-tenant.app.mycluster.iguazio.com">
To store the artifacts on the remote server, you need to set the
MLRUN_ARTIFACT_PATHto the desired root folder of your artifact. You can use template values in the artifact path. The supported values are:{{project}}to include the project name in the path.{{run.uid}}to include the specific run uid in the artifact path.
For example:
MLRUN_ARTIFACT_PATH=/User/artifacts/{{project}}
or:
MLRUN_ARTIFACT_PATH=/User/artifacts/{{project}}/{{run.uid}}
If the remote service is on an instance of the Iguazio MLOps Platform (“the platform”), set the following environment variables as well; replace the
<...>placeholders with the information for your specific platform cluster:V3IO_USERNAME=<username of a platform user with access to the MLRun service> V3IO_API=<API endpoint of the webapi service endpoint; e.g., "https://default-tenant.app.mycluster.iguazio.com:8444"> V3IO_ACCESS_KEY=<platform access key>
You can get the platform access key from the platform dashboard: select the user-profile picture or icon from the top right corner of any page, and select Access Keys from the menu. In the Access Keys window, either copy an existing access key or create a new key and copy it. Alternatively, you can get the access key by checking the value of the
V3IO_ACCESS_KEYenvironment variable in a web-shell or Jupyter Notebook service.
IDE configuration
Remote environment from PyCharm
You can use PyCharm with MLRun remote by changing the environment variables configuration.
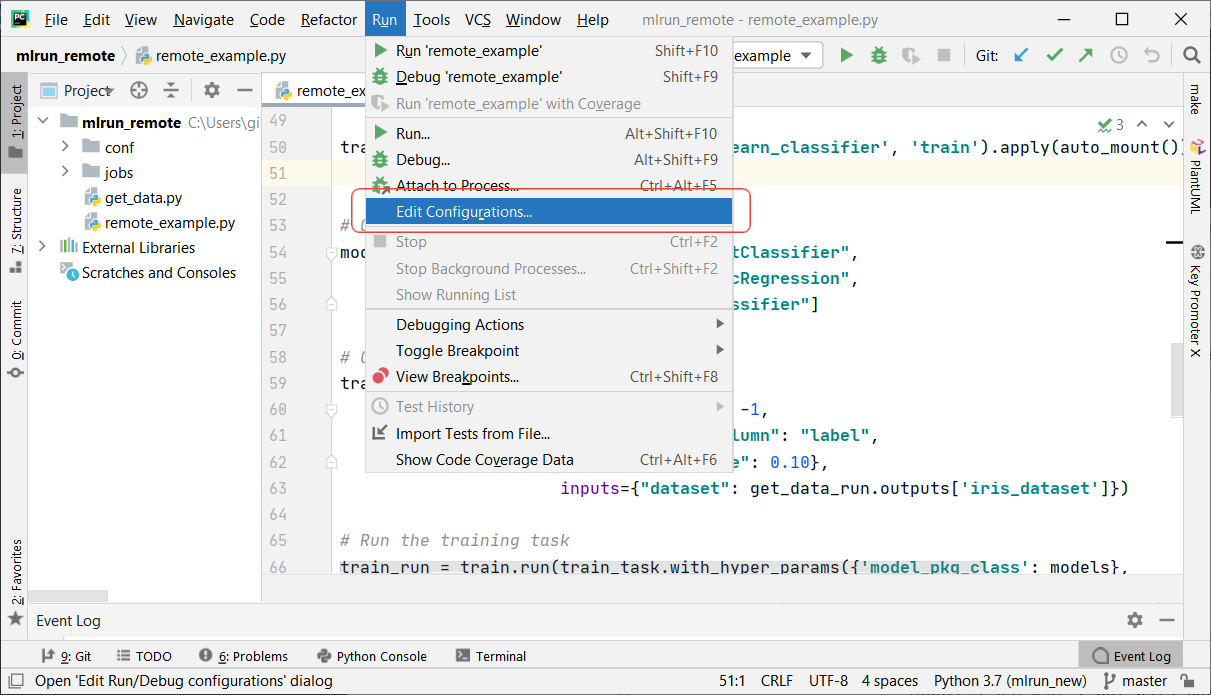
From the main menu, choose Run | Edit Configurations.
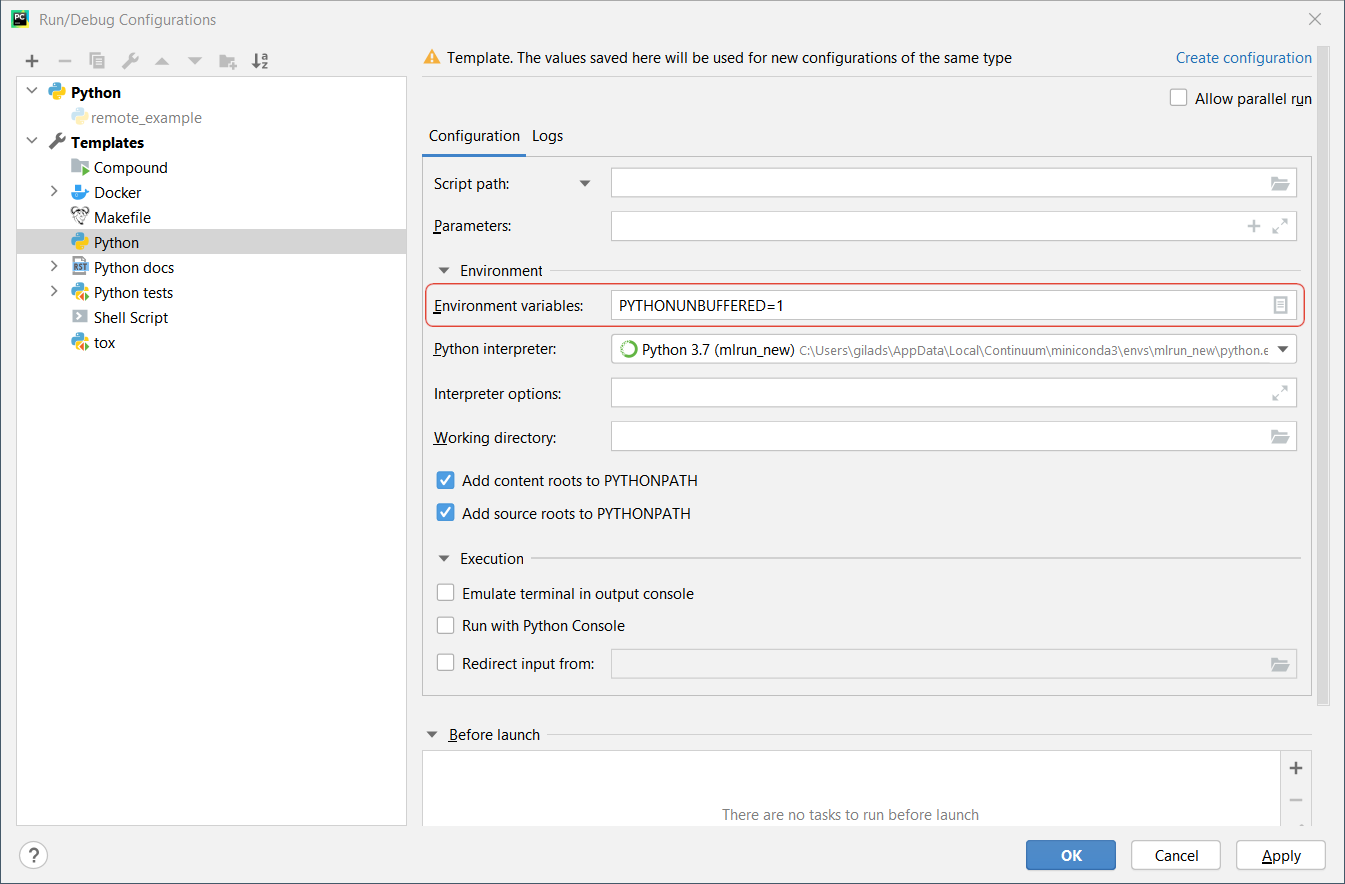
To set-up default values for all Python configurations, on the left-hand pane of the run/debug configuration dialog, expand the Templates node and select the Python node. The corresponding configuration template appears in the right-hand pane. Alternatively, you can edit a specific file configuration by choosing the corresponding file on the left-hand pane. Choose the Environment Variables edit box and expand it to edit the environment variables.
Add the environment variables and values of
MLRUN_DBPATH,MLRUN_ARTIFACT_PATH,V3IO_USERNAME,V3IO_API, andV3IO_ACCESS_KEY.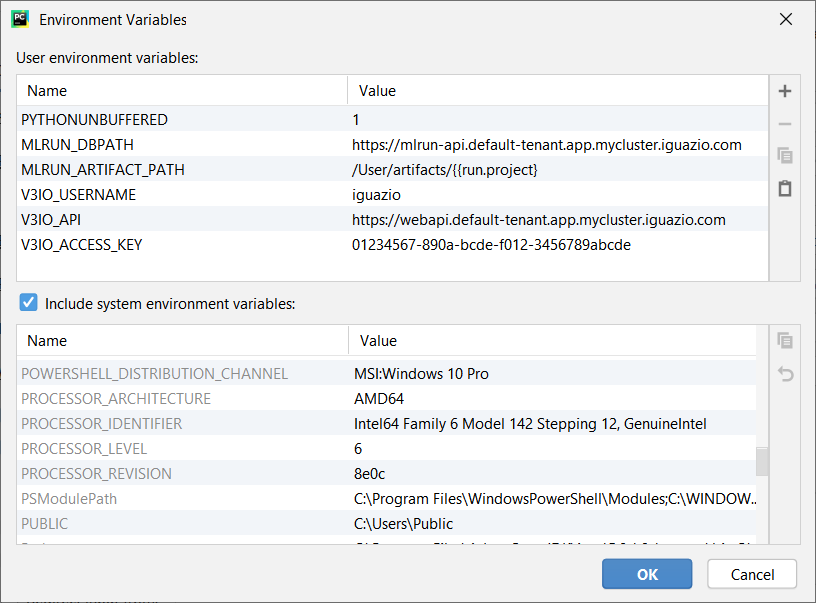
Remote environment from VSCode
Create environment file
Create an environment file called mlrun.env in your workspace folder. Copy-paste the configuration below; replace the <...> placeholders to identify your remote target:
# Remote URL to mlrun service
MLRUN_DBPATH=<API endpoint of the MLRun APIs service endpoint; e.g., "https://mlrun-api.default-tenant.app.mycluster.iguazio.com">
# Root artifact path on the remote server
MLRUN_ARTIFACT_PATH=<remote path; e.g., "/User/artifacts/{{run.project}}">
# Iguazio platform username
V3IO_USERNAME=<username of a platform user with access to the MLRun service>
# V3IO data access API URL (copy from the services screen)
V3IO_API=<API endpoint of the webapi service endpoint; e.g., "https://default-tenant.app.mycluster.iguazio.com:8444">
# Iguazio V3IO data layer credentials (copy from your user settings)
V3IO_ACCESS_KEY=<platform access key>
Note: Make sure that you add
.envto your.gitignorefile. The environment file contains sensitive information that you should not store in your source control.
Create Python debug configuration
Create a debug configuration in VSCode. Configurations are defined in a launch.json file that’s stored in a .vscode folder in your workspace.
To initialize debug configurations, first select the Run view in the sidebar:
![]()
If you don’t yet have any configurations defined, you’ll see a button to Run and Debug, as well as a link to create a configuration (launch.json) file:
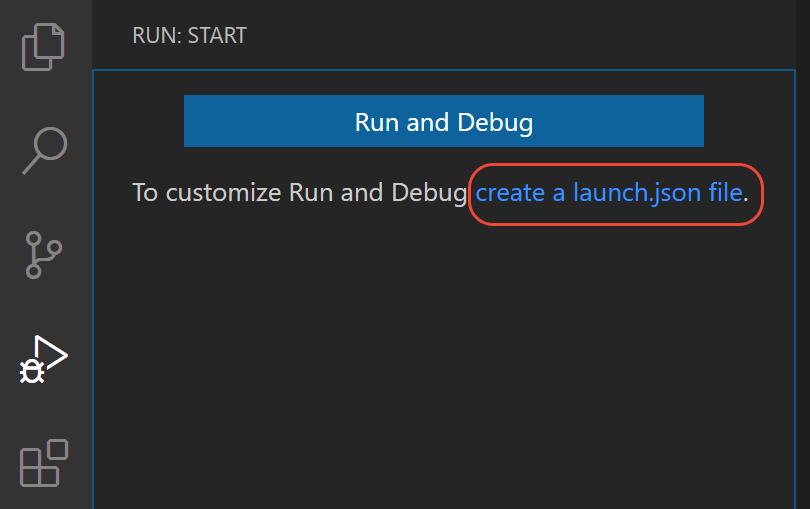
To generate a launch.json file with Python configurations, do the following steps:
Click the create a launch.json file link (circled in the image above) or use the Run > Open configurations menu command.
A configuration menu opens from the Command Palette. Select the type of debug configuration you want for the opened file. For now, in the Select a debug configuration menu that appears, select Python File.
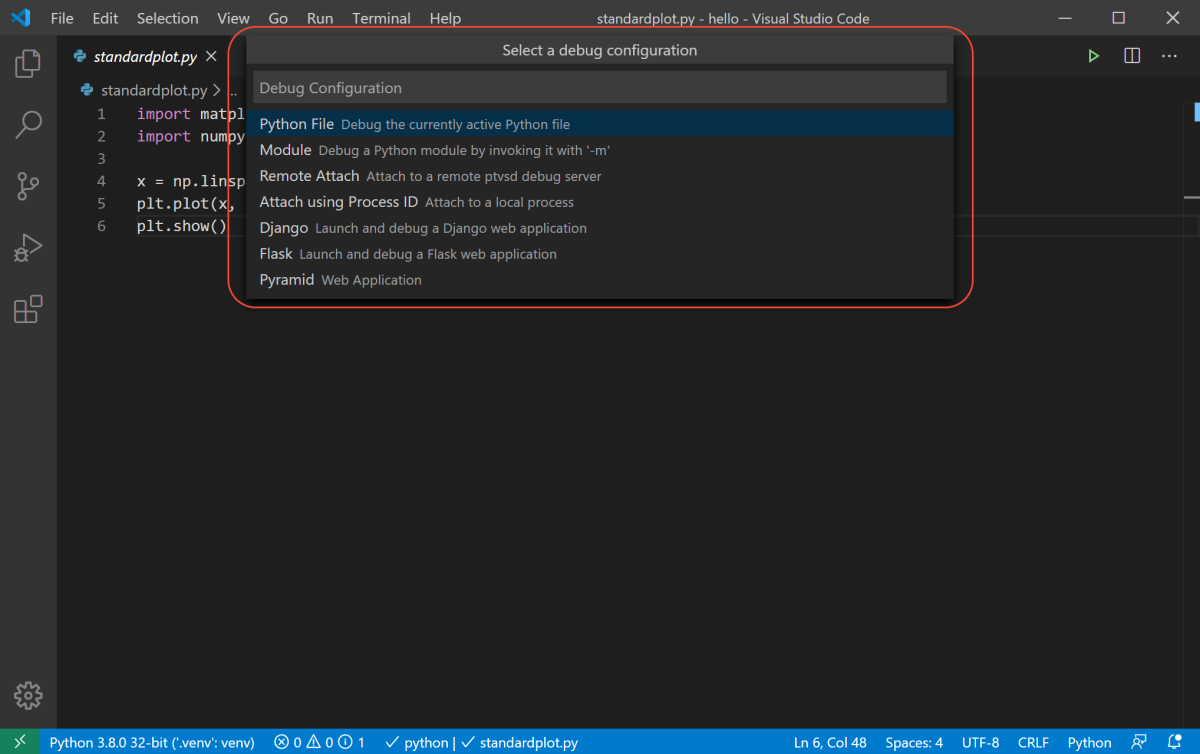
Note Starting a debugging session through the Debug Panel, F5 or Run > Start Debugging, when no configuration exists will also bring up the debug configuration menu, but will not create a launch.json file.
The Python extension then creates and opens a
launch.jsonfile that contains a pre-defined configuration based on what you previously selected, in this case Python File. You can modify configurations (to add arguments, for example), and also add custom configurations.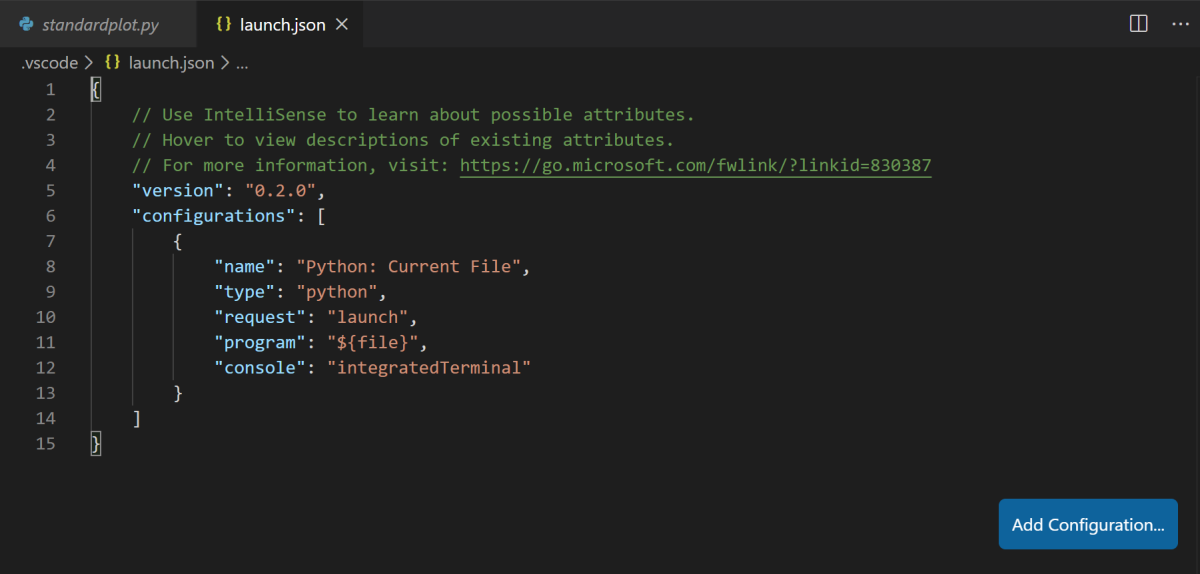
Set environment file in debug configuration
Add an envFile setting to your configuration with the value of ${workspaceFolder}/mlrun.env
If you created a new configuration in the previous step, your launch.json would look as follows:
{
    // Use IntelliSense to learn about possible attributes.
    // Hover to view descriptions of existing attributes.
    // For more information, visit: https://go.microsoft.com/fwlink/?linkid=830387
    "version": "0.2.0",
    "configurations": [
        {
            "name": "Python: Current File",
            "type": "python",
            "request": "launch",
            "program": "${file}",
            "console": "integratedTerminal",
            "envFile": "${workspaceFolder}/mlrun.env"
        }
    ]
}
Set environment variables in a terminal
You can create a script that sets the desired environment variables before launching your IDE
Create a file mlrun_env.sh, and copy-paste the code below; replace the <...> placeholders to identify your remote target:
#!/usr/bin/env bash

# Remote URL to mlrun service
export MLRUN_DBPATH=<API endpoint of the MLRun APIs service endpoint; e.g., "https://mlrun-api.default-tenant.app.mycluster.iguazio.com">
# Root artifact path on the remote server
export MLRUN_ARTIFACT_PATH=<remote path; e.g., "/User/artifacts/{{run.project}}">
# Iguazio platform username
export V3IO_USERNAME=<username of a platform user with access to the MLRun service>
# V3IO data access API URL (copy from the services screen)
export V3IO_API=<API endpoint of the webapi service endpoint; e.g., "https://default-tenant.app.mycluster.iguazio.com:8444">
# Iguazio V3IO data layer credentials (copy from your user settings)
export V3IO_ACCESS_KEY=<platform access key>
In your terminal session execute:
source mlrun_env.sh
Then launch your IDE from the same terminal session.