Set up your environment
Contents
Set up your environment #
You can write your code on a local machine while running your functions on a remote cluster. This tutorial explains how to set this up.
In this section
Prerequisites#
Before you begin, ensure that the following prerequisites are met:
Applications:
Python 3.9
Recommended pip 22.x+
Set up client environment#
Basic
Runpip install mlrun
This installs MLRun locally with the requirements in the requirements.txt.
Note
To install a specific version, use the command: pip install mlrun==<version>. Replace the <version> placeholder with the MLRun version number.
Advanced
If you expect to connect to, or work with, cloud providers (Azure/Google Cloud/S3), you can install additional packages. This is not part of the regular requirements since not all users work with those platforms. Using this option reduces the dependencies and the size of the installation. The additional packages include:
pip install mlrun[s3]Install requirements for S3pip install mlrun[azure-blob-storage]Install requirements for Azure blob storagepip install mlrun[google-cloud-storage]Install requirements for Google cloud storage
To install all extras, run:
pip install mlrun[complete]See the full list here.
Alternatively, if you already installed a previous version of MLRun, upgrade it by running:
pip install -U mlrun==<version>
Ensure that you have remote access to your MLRun service (i.e., to the service URL on the remote Kubernetes cluster).
Configure remote environment#
You have a few options to configure your remote environment:
Using mlrun config set command in MLRun CLI#
Example 1
Run this command in MLRun CLI:
mlrun config set -a http://localhost:8080
It creates the following environment file:
# this is an env file
MLRUN_DBPATH=http://localhost:8080
MLRUN_DBPATH saves the URL endpoint of the MLRun APIs service endpoint. Since it is localhost, username and access_key are not required (as in Example2)
Example 2
Note: Only relevant if your remote service is on an instance of the Iguazio MLOps Platform (not MLRun CE).
Run this command in MLRun CLI:
mlrun config set -a https://mlrun-api.default-tenant.app.xxx.iguazio-cd1.com -u joe -k mykey -e
It creates the following environment file:
# this is another env file
V3IO_USERNAME=joe
V3IO_ACCESS_KEY=mykey
MLRUN_DBPATH=https://mlrun-api.default-tenant.app.xxx.iguazio-cd1.com
V3IO_USERNAME saves the username of a platform user with access to the MLRun service. V3IO_ACCESS_KEY saves the platform access key.
You can get the platform access key from the platform dashboard: select the user-profile picture or icon from the top right corner of any
page, and select Access Keys from the menu. In the Access Keys window, either copy an existing access key or create a new
key and copy it. Alternatively, you can get the access key by checking the value of the V3IO_ACCESS_KEY environment variable in a web shell or Jupyter Notebook service.
Note
If the MLRUN_DBPATH points to a remote iguazio cluster and the V3IO_API and/or V3IO_FRAMESD vars are not set, they are inferred from the DBPATH.
Explanation:
The mlrun config set command sets configuration parameters in mlrun default or the specified environment file. By default, it stores all
of the configuration into the default environment file, and your own environment file does not need editing. The default environment file is
created by default at ~/.mlrun.env for Linux and %USERPROFILE%/.mlrun.env for Windows.
The set command can work with the following parameters:
--env-fileor-fto set the url path to the mlrun environment file--apior-ato set the url (local or remote) for MLRun API--usernameor-uto set the username--access-keyor-kto set the access key--artifact-pathor-pto set the artifact path--env-varsor-eto set additional environment variables, e.g. -eENV_NAME=<value>
Using mlrun.set_environment command in MLRun SDK#
You can set the environment using mlrun.set_environment command in MLRun SDK and either use the env_file parameter that saves the
path/url to the .env file (which holds MLRun config and other env vars) or use args (without uploading from the environment file), for example:
# Use local service
mlrun.set_environment("http://localhost:8080", artifact_path="./")
# Use remote service
mlrun.set_environment("<remote-service-url>", access_key="xyz", username="joe")
For more explanations read the documentation mlrun.set_environment.
Using your IDE (e.g. PyCharm or VSCode)#
Use these procedures to access MLRun remotely from your IDE (PyCharm or VSCode).
Create environment file#
Create an environment file called mlrun.env in your workspace folder. Copy-paste the configuration below:
# Remote URL to mlrun service
MLRUN_DBPATH=<API endpoint of the MLRun APIs service endpoint; e.g., "https://mlrun-api.default-tenant.app.mycluster.iguazio.com">
# Iguazio platform username
V3IO_USERNAME=<username of a platform user with access to the MLRun service>
# Iguazio V3IO data layer credentials (copy from your user settings)
V3IO_ACCESS_KEY=<platform access key>
Note
If your remote service is on an instance of the Iguazio MLOps Platform, you can get all these parameters from the platform dashboard: select the user-profile picture or icon from the top right corner of any page, and select Remote settings. They are copied to the clipboard.
Note
Make sure that you add .env to your .gitignore file. The environment file contains sensitive information that you should not store in your source control.
Remote environment from PyCharm#
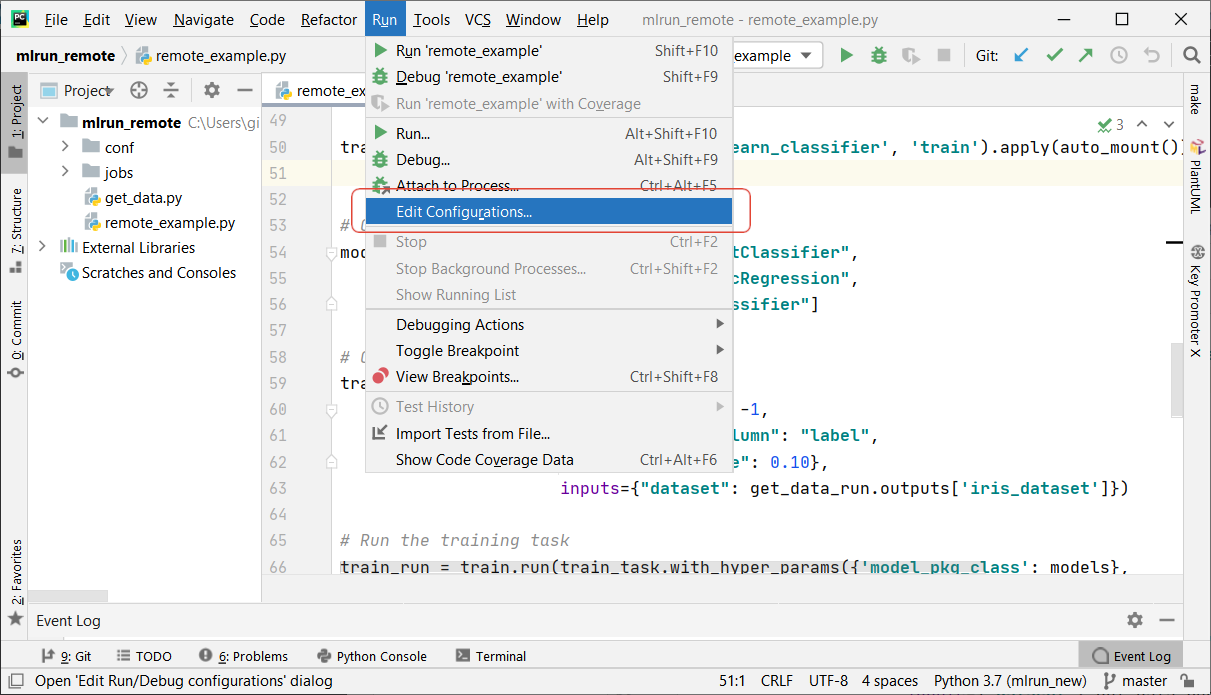
You can use PyCharm with MLRun remote by changing the environment variables configuration.
From the main menu, choose Run | Edit Configurations.
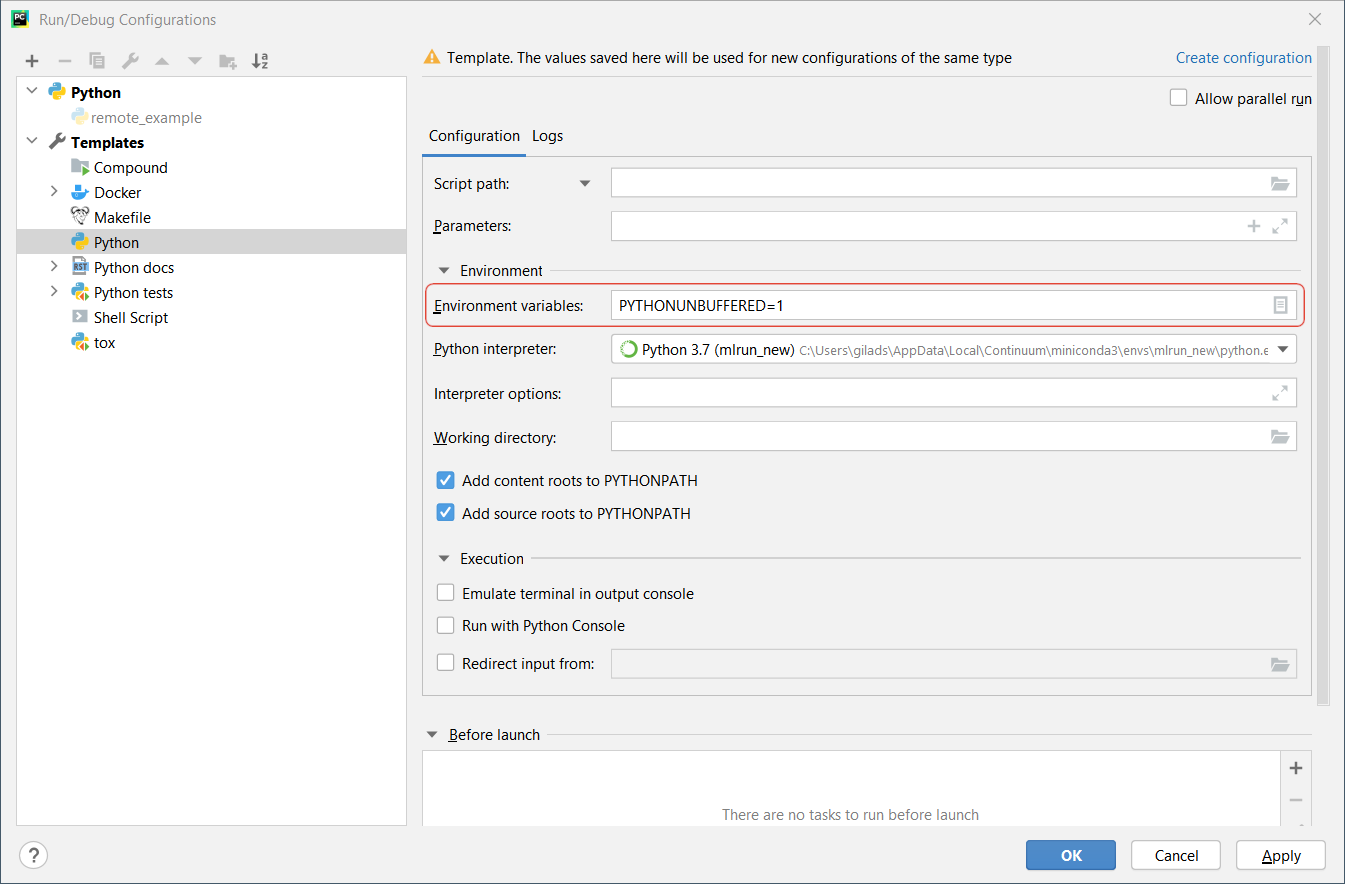
To set-up default values for all Python configurations, on the left-hand pane of the run/debug configuration dialog, expand the Templates node and select the Python node. The corresponding configuration template appears in the right-hand pane. Alternatively, you can edit a specific file configuration by choosing the corresponding file on the left-hand pane. Choose the Environment Variables edit box and expand it to edit the environment variables.
Add the environment variable and value of
MLRUN_DBPATH.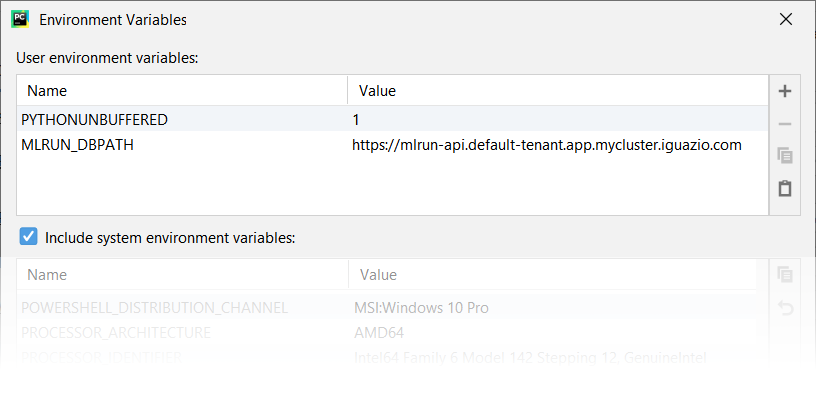
If the remote service is on an instance of the Iguazio MLOps Platform, also set the environment variables and values of
V3IO_USERNAME, andV3IO_ACCESS_KEY.
Remote environment from VScode#
Create a debug configuration in VSCode. Configurations are defined in a launch.json
file that’s stored in a .vscode folder in your workspace.
To initialize debug configurations, first select the Run view in the sidebar:
If you don’t yet have any configurations defined, you’ll see a button to Run and Debug, as well as a link to create a configuration (launch.json) file:
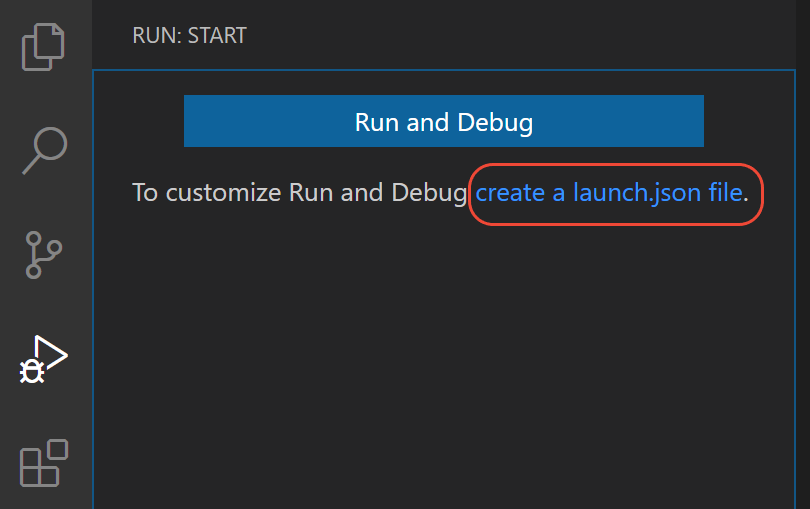
To generate a launch.json file with Python configurations:
Click the create a launch.json file link (circled in the image above) or use the Run > Open configurations menu command.
A configuration menu opens from the Command Palette. Select the type of debug configuration you want for the opened file. For now, in the Select a debug configuration menu that appears, select Python File.

Note
Starting a debugging session through the Debug Panel, F5 or Run > Start Debugging, when no configuration exists also brings up the debug configuration menu, but does not create a launch.json file.
The Python extension then creates and opens a
launch.jsonfile that contains a pre-defined configuration based on what you previously selected, in this case Python File. You can modify configurations (to add arguments, for example), and also add custom configurations.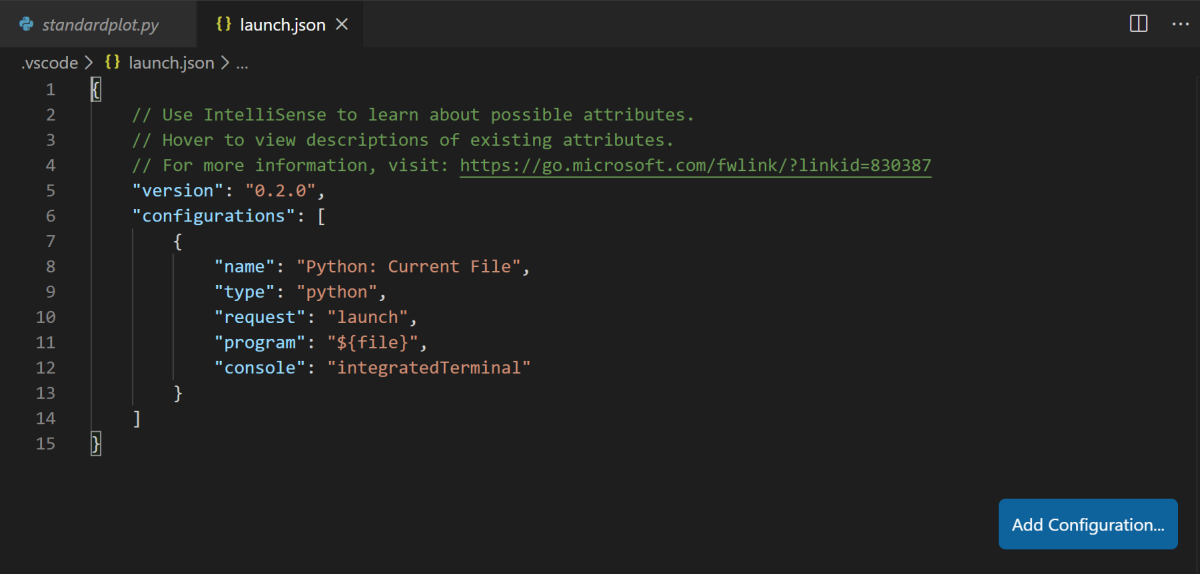
Set environment file in debug configuration#
Add an envFile setting to your configuration with the value of ${workspaceFolder}/mlrun.env
If you created a new configuration in the previous step, your launch.json would look as follows:
{
    // Use IntelliSense to learn about possible attributes.
    // Hover to view descriptions of existing attributes.
    // For more information, visit: https://go.microsoft.com/fwlink/?linkid=830387
    "version": "0.2.0",
    "configurations": [
        {
            "name": "Python: Current File",
            "type": "python",
            "request": "launch",
            "program": "${file}",
            "console": "integratedTerminal",
            "envFile": "${workspaceFolder}/mlrun.env"
        }
    ]
}